Initial setup Evolis Primacy 2
To use the printer with vistrax, you must first set up the device. This involves installing the printer driver. The format/label is then imported into vistrax and the paper type is set.
Printer Driver Installation
You can obtain the driver from the manufacturer's website. Follow the installation instructions displayed there.
cardPresso Installation
The installation file and instructions can also be found on the official website.
1. Rewrite Print
Note
Please note that the heat-sensitive layer of rewritable cards is limited to one colour (black or blue). The colour is selected when purchasing the cards
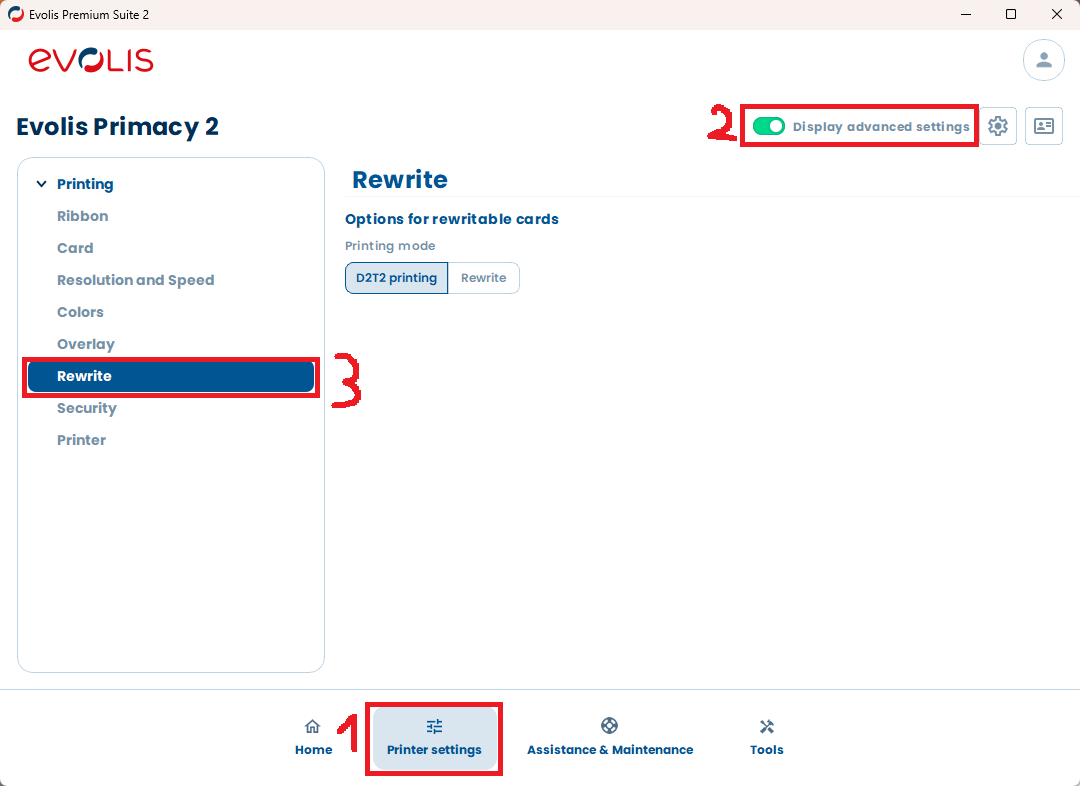
1.1 To use the rewrite function, start Evolis Premium Suite 2. Then click on 'Printer settings' in the lower menu bar. The rewrite function will not be displayed until you have activated the 'Show advanced settings' option. Activate the advanced settings.
1.2 Please remove the ink ribbon and insert the rewritable cards (matt side up). This is necessary.
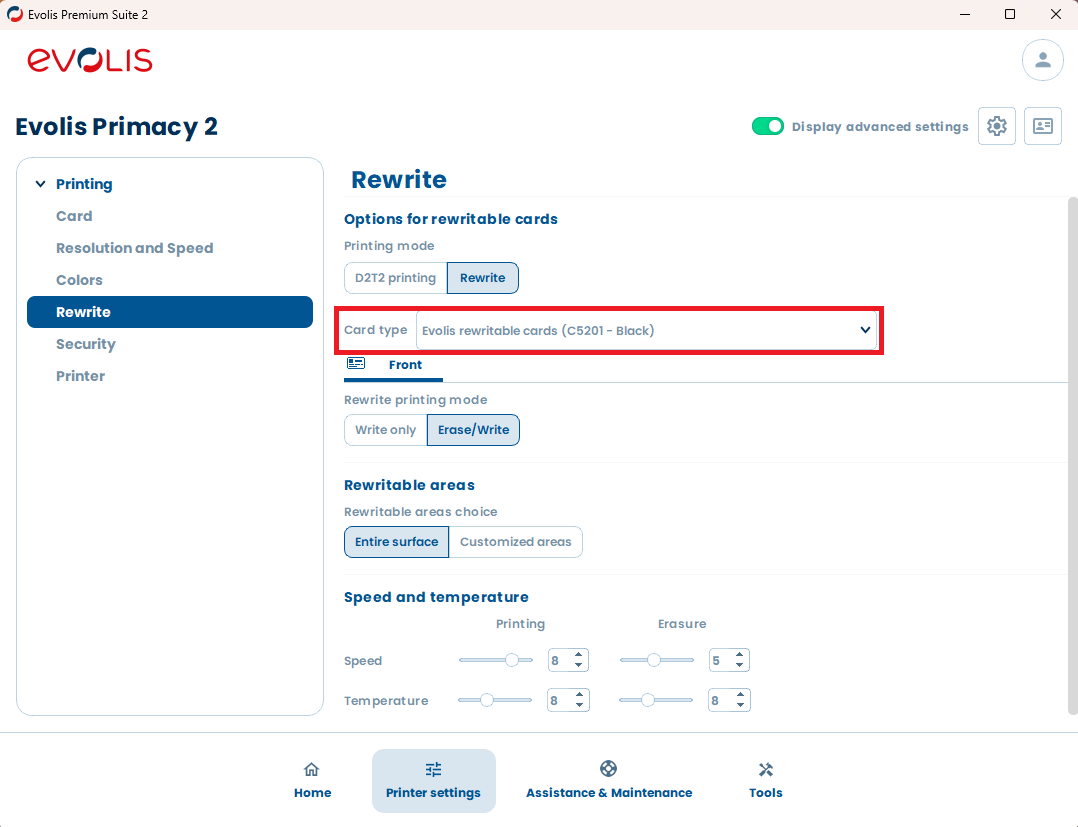
1.3 The rewrite function must now be configured. Make sure you select the correct card type. You can use the configuration in the picture as a guide.
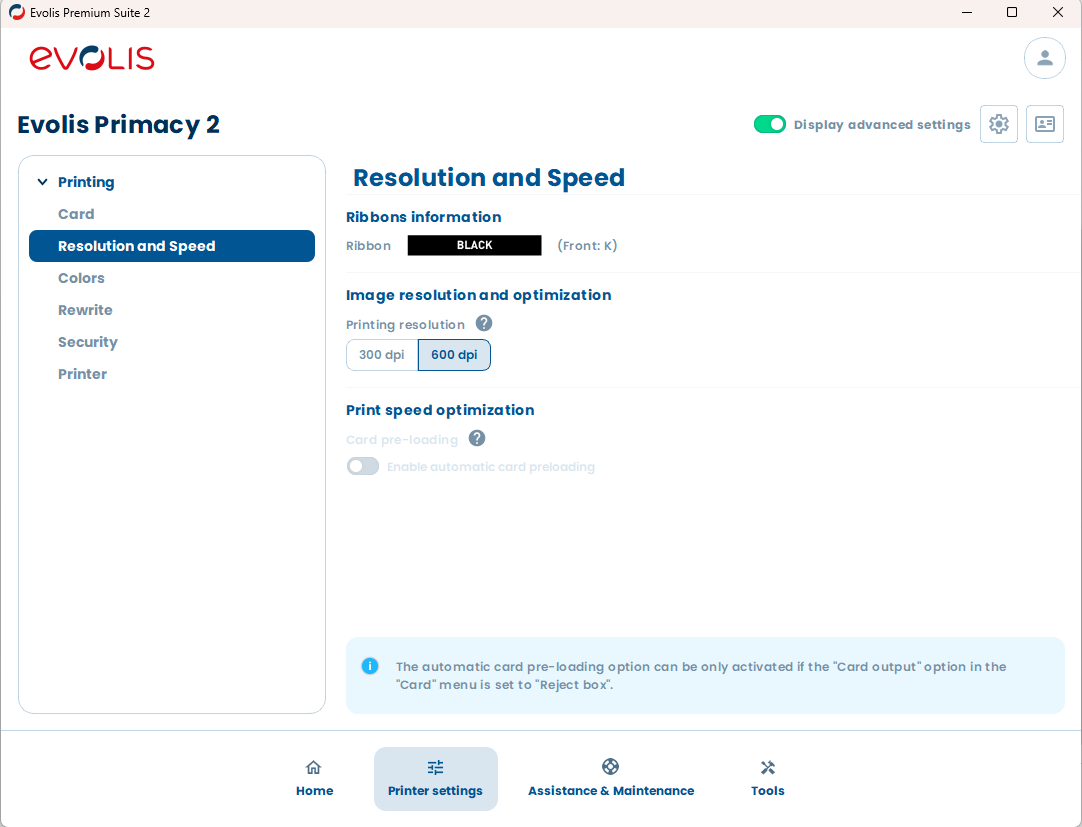
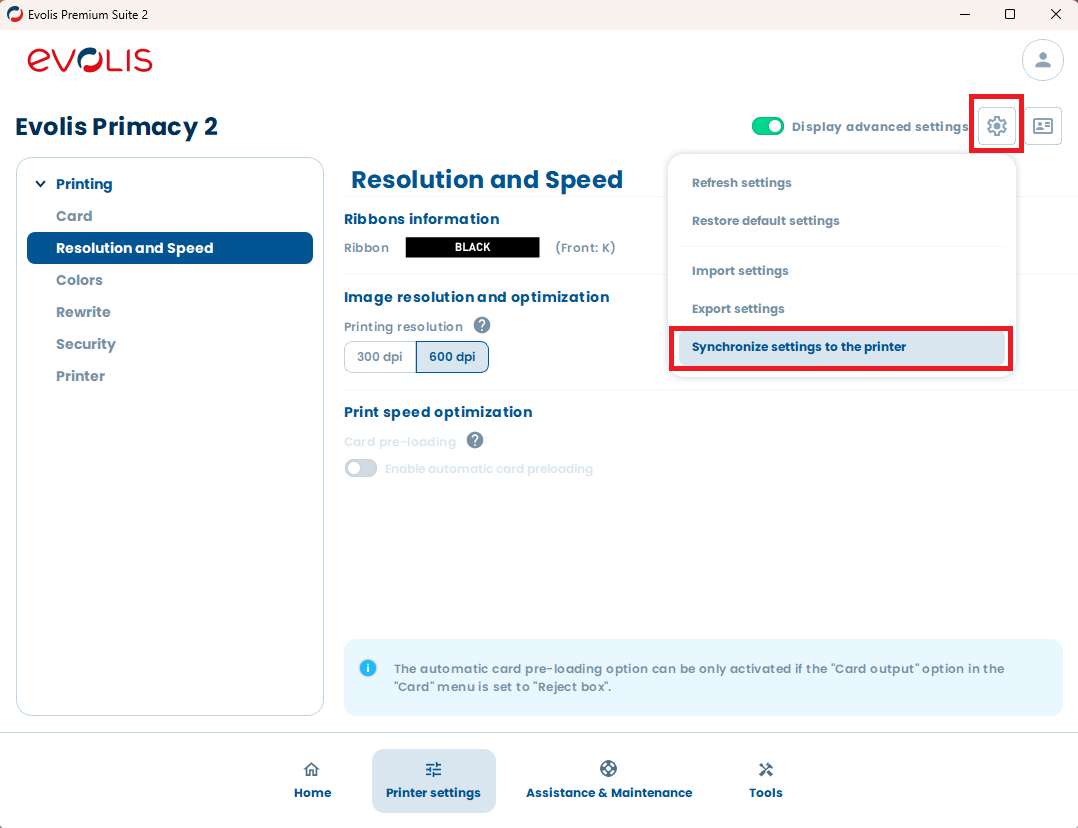
1.4 Go to the 'Resolution & Speed' menu and set the resolution & image optimisation to 600dpi.
1.5 Finally, synchronise the printer with the changed settings.
2. Delete labelled rewritable cards
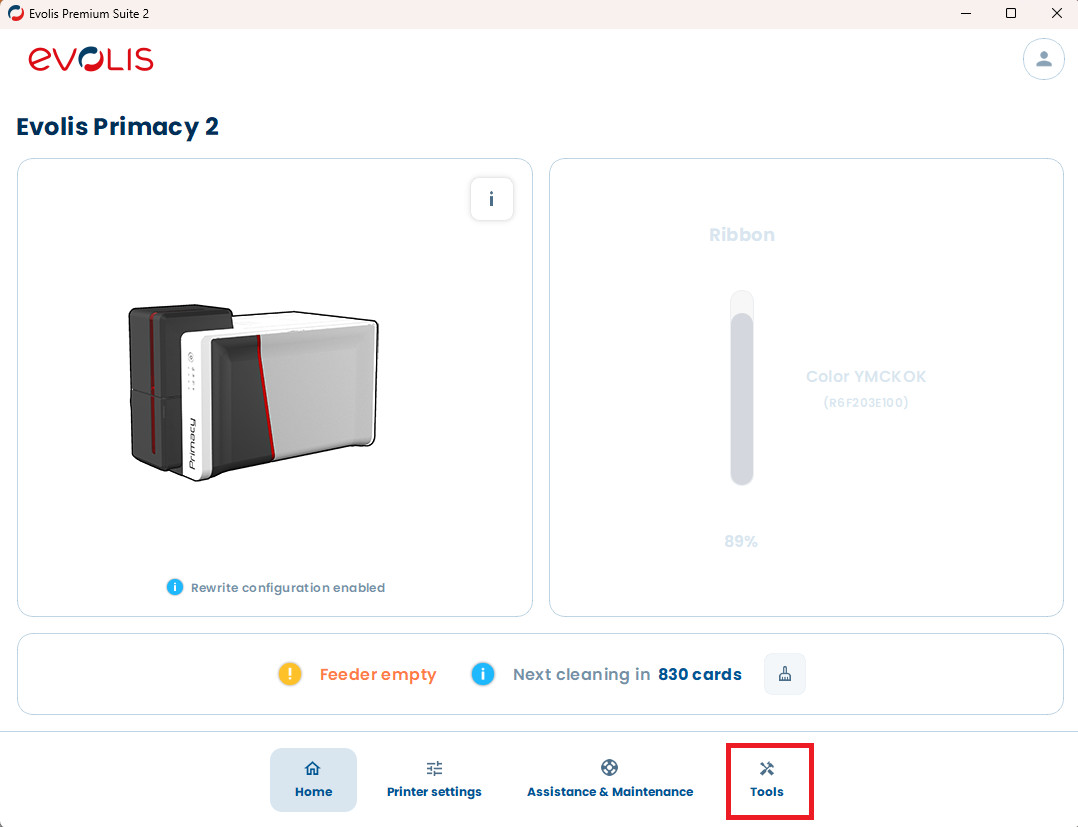
2.1 To delete rewritable cards, the rewrite mode must be activated. Insert the cards to be deleted and click on ‘Tools’ at the bottom of the menu bar.
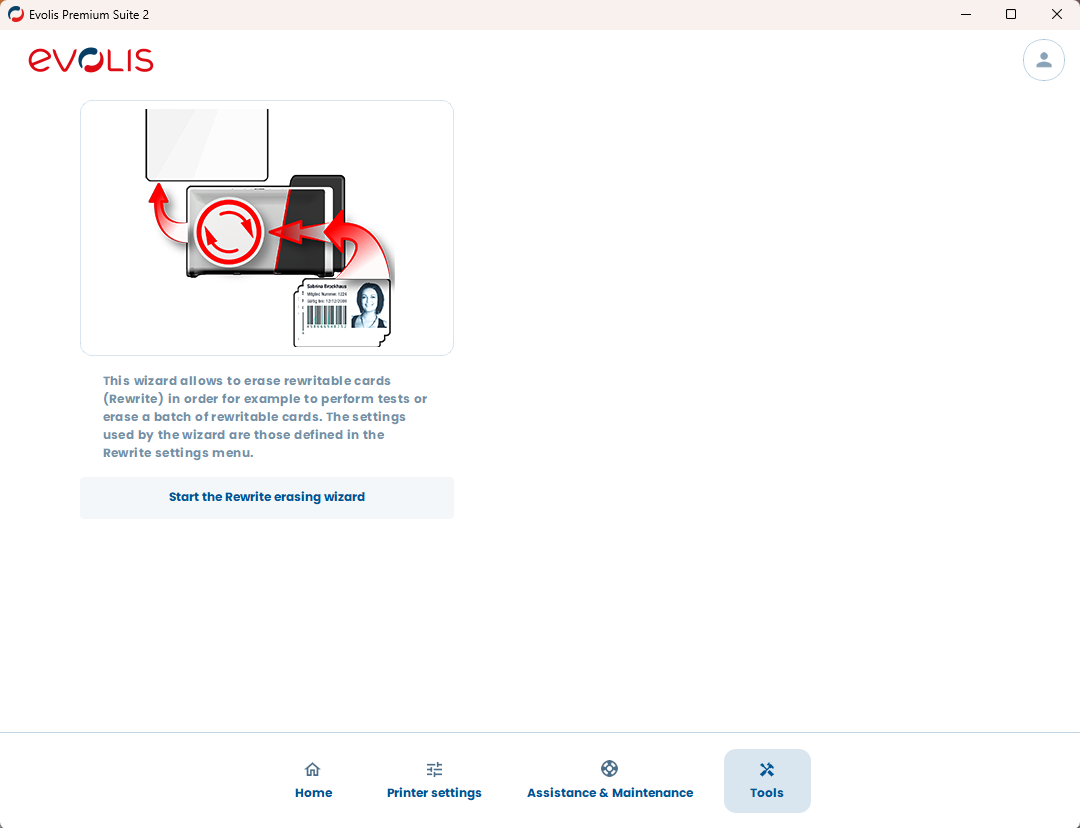
2.2 Then run the erasing wizard and follow the instructions.
3. Customise printer templates in vistrax
3.1 Use the following link to open the print layouts overview page. Click on your printer to open the layout options. Download the desired template and import it into vistrax as described in the following steps.
You will also need the following file to import it as a new paper type in chapter 3.5.
3.2 Open vistrax and choose ‘Configuration’. In option ‘Printer’, please select the previously installed printer first.
Note
If the printer is not listed in vistrax even if the initial setup is done, restart the software.
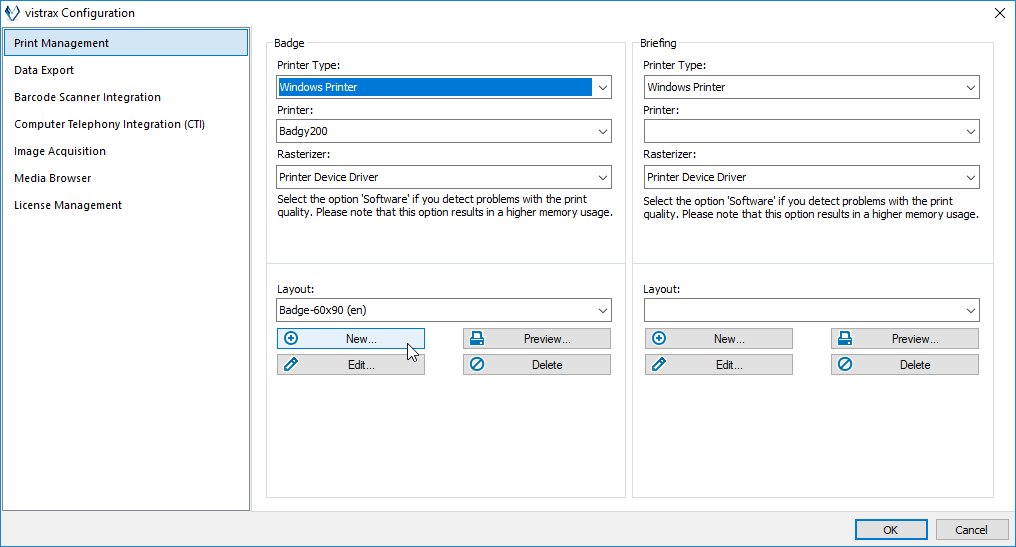
3.3 Within the Print Management in the Badge section you will need to select the aforementioned printer and import a new layout. Click on ‘New’ to import the downloaded badge and the paper-type.

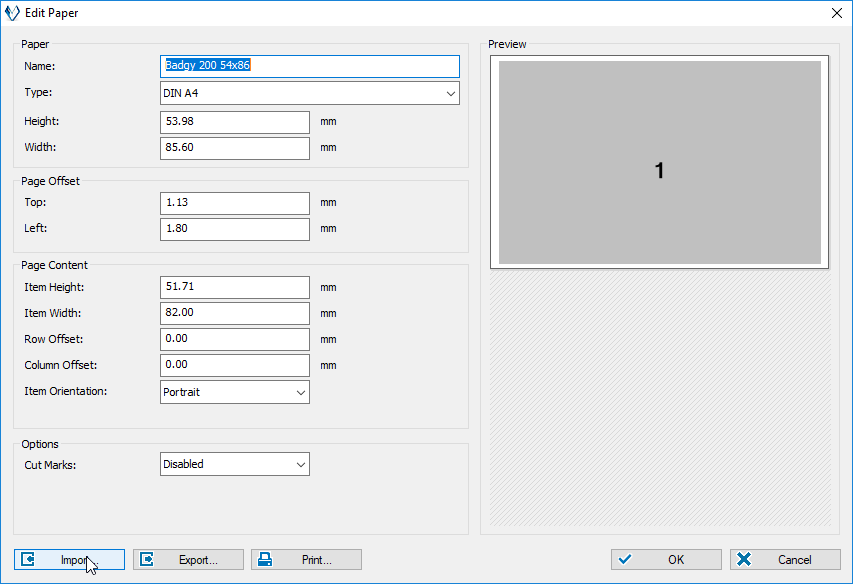
3.4 Firstly you will need to import the paper-type. Please click ‘New’ in the ‘Paper’ section.

Please select ‘No’ in the appearing window.

3.5 In the next window please click on ‘Import’ and select the downloaded paper-type from your system. After importing your view should be like the following screenshot. Close this window by clicking ‘OK’.
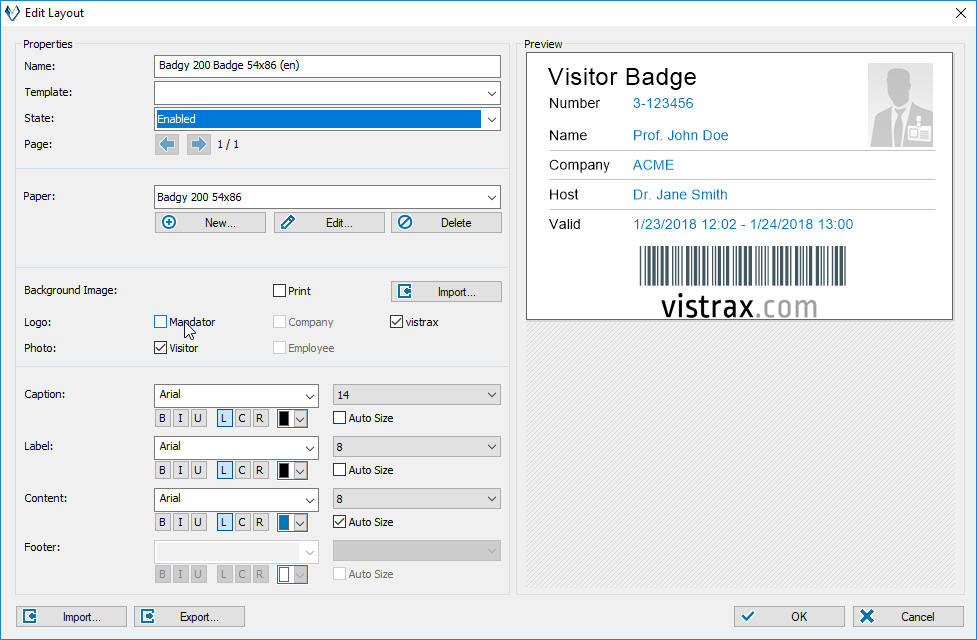
3.6 At last you need to import the badge. Click on ‘Import’ and select the downloaded badge from your system.
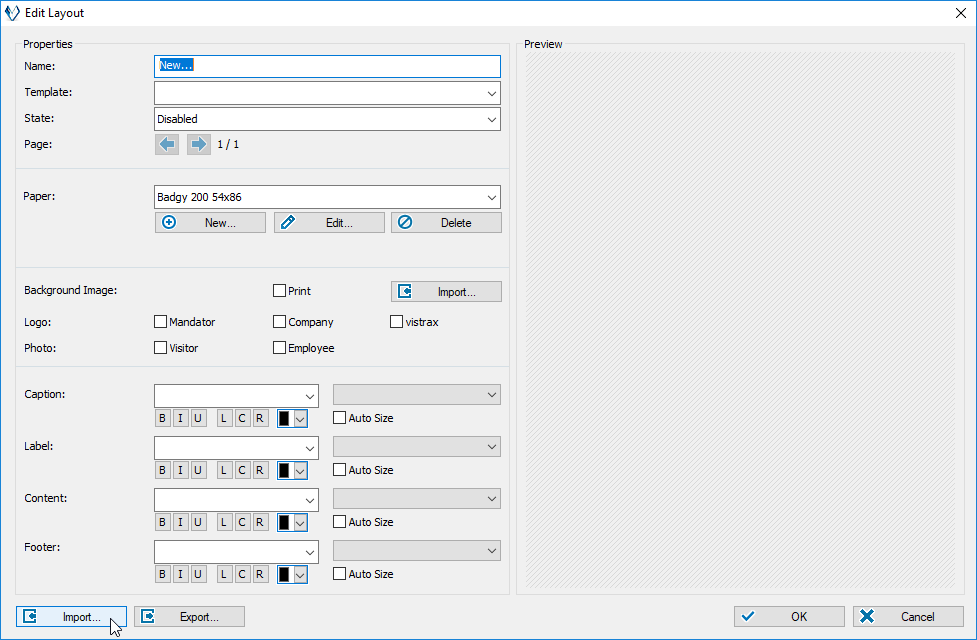
After a successful configuration your final view should be like the following screenshot. In the marked area you can disable the visitor photo and enable your company logo for the badge. For further usage the state must be set to ‘Enabled’.